Translate This Page

 Sing NOEL, sing NOEL, NOEL....NOEL!!

 
stacked NOEL.pdf stacked NOEL.pdf
Size : 15.598 Kb
Type : pdf
stacked NOEL.WPC stacked NOEL.WPC
Size : 76.557 Kb
Type : WPC

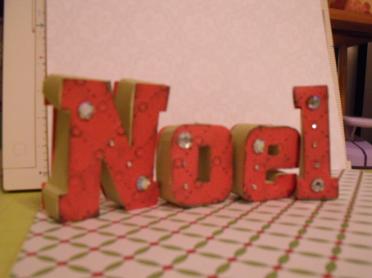
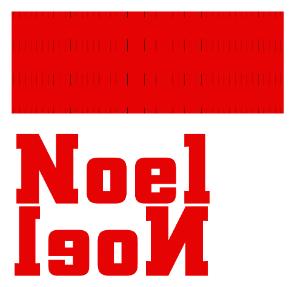
First of all, let me say that this project is not for the faint of heart or for the OCD perfectionist.  For me, it wasn't easy.  The concept is easy and can be used with any large blocked font.  The pattern has the font ready for you regular and mirrored for the back.  Then cut more strips that I provided for.  You will have to make the folds on those strips as you go along because if you try to do it ahead of time like I did (being the OCD that I am) it won't line up perfectly in the end and you will have to start over...argh.  So, to start with, take one of the strips and a ruler and run the strips against the ruler like you do with ribbon across a pair of scissor to curl the ribbon.  No, paper is different from ribbon...but this makes it more pliable.  Do this several times before trying to work with it.  Then, using your score tool on your cutting board, place the "ribbon" strip so that the edge of the mini cuts run along the cutting line...and score.....do not cut....you are making an embossed line.  I didn't put perforated cuts for this because it would weaken the "ribbon" when you go to use it.  Do this to both sides of the mini cuts.  Then fold the  mini cuts all to one side until they are flexible but tamed to one side.   Take a letter and some quick drying tacky glue (I used Aileen's) and start bending the strip along the edge of the letter and tack it down as you go.  DO NOT put glue along the entire edge...trust me you will have a mess.  This requires much patience and persistence.  When working on the "O" and the "e", be sure to do the center holes first or you will kill yourself afterwards....LOL.  My "masterpiece" is not perfect.  But, with some rhinestones and ink over dry embossed paper, it turned out looking pretty good.  If I were to do it over again, I would make each letter much larger than I did to start with....just to get the practise  in.  I would have left the strips the same size....but would have made a lot more than I did. 

     So, I took 2 hours to make this and was so proud of myself.  My husband shows up from work and asks what is new?  I told him that I made the NOEL....Look Honey!  He looked at it....like....what!?  I told him that it took me 2 hours to make it.  He shook his head.  Then he turned around and asked, "Couldn't you have bought one of those at the Dollar Tree?" It stung...but I knew that he was probably right.  That got me to thinking...those things are all made in China.  It took me 2 hours to make those 4 letters....and Chinese women sit in sweat shops earning cents to the piece....so maybe it would cost 4 cents to make plus the materials...maybe 2 or 3 dollars in materials.....and then you can buy it for a dollar at the Dollar store....it just makes one wonder.  But, I have the satisfaction of saying that I made it.  And, the next time that I go to the dollar store and see someting like this...made in China....I will wonder about the lady that slaved over it for a few pennies by American standards.  We need to remember the people behind the Communism. :-/

 Christmas Cone Tree

 
Xmas cone tree.pdf Xmas cone tree.pdf
Size : 42.678 Kb
Type : pdf
Xmas cone tree.WPC Xmas cone tree.WPC
Size : 55.453 Kb
Type : WPC

 This is a very easy project to make with the kids.  Take an 8 1/2 X 11" piece of paper.....yes paper....not cardstock....and make a cone by rolling it so that one corner of the paper becomes the top tip.  Secure your skinny cone with either a staple or tape.  Cut off the bottom until it is evenly flat and will stand freely.  The one in the left photo is made from typing paper. 

     Cut out the file and stagger the layers starting with the largest one at the bottom and the smallest at the top.  Secure the top one with a dab of glue.  Use your imagination on how to further decorate this.  The centers are perforated so that you can bend the pine needles up or down.  If you enlarge the pattern and the cone....you can get a larger tree.  You could also make a smaller tree by cutting more off of the bottom and then layering less pine onto the cone.  That way, you can have varying heights of trees on display.  I can see an array of these on a dining room buffet.  It might be pretty to wet emboss some snow on the ends of the "needles".  Use your imagination!


 Exploding Box for Christmas

Xmas explosion box pull up folder.pdf Xmas explosion box pull up folder.pdf
Size : 53.716 Kb
Type : pdf
Xmas explosion box middle.pdf Xmas explosion box middle.pdf
Size : 31.054 Kb
Type : pdf
Xmas explosion box tag pocket .pdf Xmas explosion box tag pocket .pdf
Size : 0 Kb
Type : pdf
Xmas explosion box1.pdf Xmas explosion box1.pdf
Size : 50.06 Kb
Type : pdf
Xmas explosion box2.pdf Xmas explosion box2.pdf
Size : 7.172 Kb
Type : pdf
Xmas explosion box3.pdf Xmas explosion box3.pdf
Size : 1.55 Kb
Type : pdf
Xmas explosion box bottom or base.pdf Xmas explosion box bottom or base.pdf
Size : 42.273 Kb
Type : pdf
Xmas explosion box center gift box.pdf Xmas explosion box center gift box.pdf
Size : 21.081 Kb
Type : pdf
Xmas explosion box top.pdf Xmas explosion box top.pdf
Size : 31.304 Kb
Type : pdf
Xmas explosion box lid .pdf Xmas explosion box lid .pdf
Size : 0 Kb
Type : pdf
Xmas explosion box.WPC Xmas explosion box.WPC
Size : 98.989 Kb
Type : WPC
 

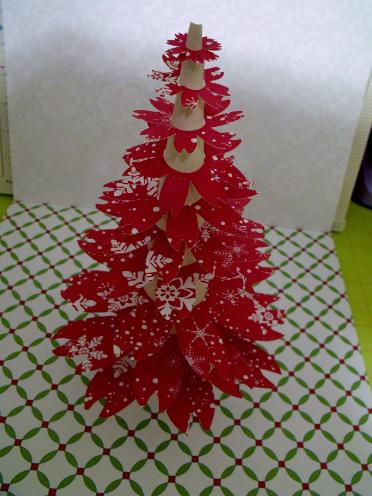
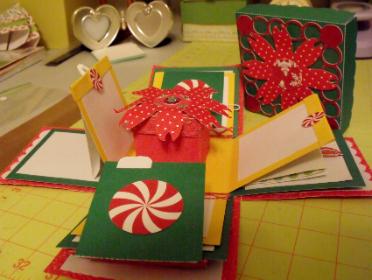
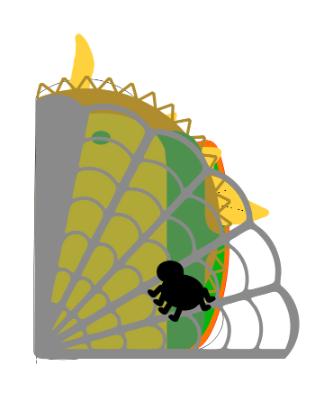
 This is your typical explosion box with all fo the embellishments used in the project.  Be sure to watch the video for explanations to hopefully make things a little easier for you. 

 Give Thanks!

 This is something that can be used for each place setting so that guests will know where you want to seat them at your Thanksgiving Day feast.  Or, if you shrink the pattern, these could be used for name tags.  Be sure to use a different color than the white...I just used it so that it would stand out for the photo.  I used a Tim Holtz embossing folder on the acorn "cap".

acorn napkin holder .pdf acorn napkin holder .pdf
Size : 0 Kb
Type : pdf
acorn napkin holder .WPC acorn napkin holder .WPC
Size : 0 Kb
Type : WPC

 When you make this tree, you will see one tree...but you will need two.  Make one with a slit at the top and one with the slit at the bottom and then slide the two together.  I would recommend mounting the tree onto something like a plate.  Surround the tree base with loose leaves.  Guests can the take a leaf and write what they are thankful for on it with their name on the back.  Tape it onto the tree and display.

thankful tree leaves.pdf thankful tree leaves.pdf
Size : 55.912 Kb
Type : pdf
thankful tree.pdf thankful tree.pdf
Size : 41.977 Kb
Type : pdf
thankful tree.WPC thankful tree.WPC
Size : 95.464 Kb
Type : WPC

Pumpkin Strips 

 When I was a teacher, for many years, I would make these pumkins with my students on a very elementary basis.  If you look at the one to the left, I took orange paper and stamped it with swirls.  The one in the middle is the enclosed file...with stars.  The one on the right was a basic pumpkin that I punched out with a Martha Stewart border punch.  I wanted to include everyone in on this project so that even those without machines would be able to do it.

When you open the file, and if you don't want the stars so that you can either punch or stamp the strips, just enclose the stars and hit delete.  Be sure to use double-sided heavy weighted paper...or use a medium cardstock.  I put battery-operated lights in the center.  I didn't cover the bases for the photo so that you could see them better.  I have since covered the candle base with orange paper to match the pumpkins. 

pumpkin strips.pdf pumpkin strips.pdf
Size : 160.113 Kb
Type : pdf
pumpkin strips.WPC pumpkin strips.WPC
Size : 1717.635 Kb
Type : WPC

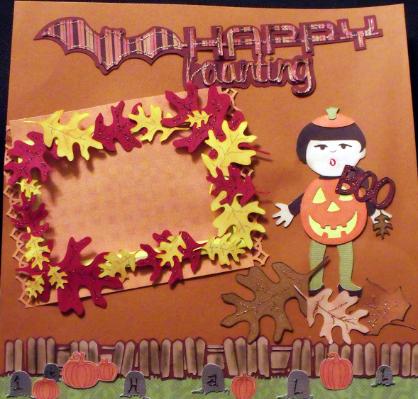
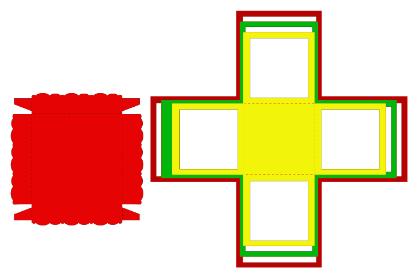
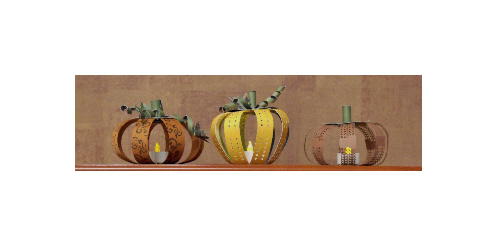
Cut out all pieces as shown on the pattern by the colors.  Take the triangular shape (the stem) and start to curl it around a meat skewer....not a pencil because the pencil is not thin enough to curl the paper.  Push the curled stem through the hole in the green circular disc and adhere it to the bottom of the disc with glue by bending the perforated lines.  Once this is down, take the strips of the pumpkin and curl them with the edge of a pencil or similar object like you would curl a ribbon for a gift so that it bends the fibers to slightly curl.  I used a low temp glue gun to adhere the edge of the strips to the green scalloped disc.  The size of the pumkin will be determined by how much of the strip you glue under this green scalloped disc.   Put a dab of glue on the top of the stem and place the tiny, round piece of paper on it to top off the stem. Use the 12" skinny green strip of paper to make the curls.  Glue it to the top of the green disc near the stem.  I used a punch for the leaf as an after thought.  There are lots of leaves on this site in the HOLIDAY/AUTUMN section if you don't have one.  If you want a taller pumpkin like the one in the middle, then pinch the strips on the bottom of the pumpkin near the circle.  If you push down on the top of the pumpkin, you will get a shorter, fatter rendition.  Be sure to use ONLY battery-operated pscheudo candles in order to gain light....but to avoid a fire.  I bought mine at the Dollar Tree.  There were 3 in a package and they flicker.  You do have to pull out the strip on the bottom to get them to work.  After I made these, I thought that they might be pretty if I made a basic patter without the stars and dry or wet embossed the strips.  Use your imagination!

Halloween Mini Book 

 I am still working on this project.  I hope to have them made in time so that I can send them north to my grandchildren.  There will be lots of the tags and hidden pockets so that they can put whatever their little hearts desire...not to mention some Halloween photos.  I first cut one of each of these in cereal boxes that I had stashed aside.  In order to cover both sides with paper, don't forget to mirror a copy of each file when you cut them out.   I am going to make the web from acrylic. I want this to be a mixed media project.  I am thinking about curling pipe cleaners for the spider.  I will use a binder system to hold it all together.  If you are using Pazzles Inspiration PRO, DO NOT click on the box above to ungroup.  Be sure to ungroup only from the drop down box or you will have a mess.  DO NOT pick UNGROUP ALL.

Halloween mini book Boo.pdf Halloween mini book Boo.pdf
Size : 233.315 Kb
Type : pdf
Halloween mini book ghost.pdf Halloween mini book ghost.pdf
Size : 255.283 Kb
Type : pdf
Halloween mini book leaf.pdf Halloween mini book leaf.pdf
Size : 201.567 Kb
Type : pdf
Halloween mini book scalloped tab.pdf Halloween mini book scalloped tab.pdf
Size : 178.504 Kb
Type : pdf
Halloween mini book spider .pdf Halloween mini book spider .pdf
Size : 0 Kb
Type : pdf
Halloween mini book tag2.pdf Halloween mini book tag2.pdf
Size : 5.067 Kb
Type : pdf
Halloween mini book.WPC Halloween mini book.WPC
Size : 149.478 Kb
Type : WPC

 Happy

Halloween!

Pocket Frame 


Our little seedling.jpg Our little seedling.jpg
Size : 139.107 Kb
Type : jpg
Our Little Seedling.pdf Our Little Seedling.pdf
Size : 157.827 Kb
Type : pdf
Love Seeds.pdf Love Seeds.pdf
Size : 129.882 Kb
Type : pdf
Our Little Seedling.WPC Our Little Seedling.WPC
Size : 178.705 Kb
Type : WPC
love seeds.jpg love seeds.jpg
Size : 102.046 Kb
Type : jpg
Love Seeds.WPC Love Seeds.WPC
Size : 123.105 Kb
Type : WPC

     I had to devise a way to give a photo album as a gift to a new mother who has next to no time on her hands. So, I decided to make a pocket frame.  There are two different designs for this frame.  The first one is flat.  You would glue three edges down after folding them under and then the recipient could then slide their 4X6 photo in and out of the frame.  If their photo is less than 4X6, I would recommend gluing the photo to a 4X6 backing paper and then slipping that into the frame.  But, this design was made with 4X6 photos in mind because that is what the lay person tends to order from the drugstore photo labs.  I wanted to do this also because I when babies are young, most people tend to take tons of photos.  She could place photos behind photos if she so chose and then switch them out when she finally makes up her mind which to keep in the book permanently.  Anyway, that was the method behind my madness. 

    Now the second design is raised about 1/10 of an inch to give it a 3-d effect.  I am not done with the album, so I am not sure if it is going to effect how the album closes when all is said and done.  But, should there be a problem, I figure that I will take the album apart and put foam in between the pages so that they are lifted and thus the book should close fine.  But, that still remains to be seen.

Video Instructions for making the basic frame can be found here:   http://www.youtube.com/watch?v=Ke8JCo0zqzA&feature=plcp

I covered the left frame with a variety of leaves from punches and my Pazzles machine cut outs.  You can find a variety of leaves here:   http://izzaboutchu.yolasite.com/autumn-splendor.php & http://izzaboutchu.yolasite.com/halloween.php  I regret that I cannot share the little girl because I can't remember the source of the file.  The same is true for the fence and tombstones.

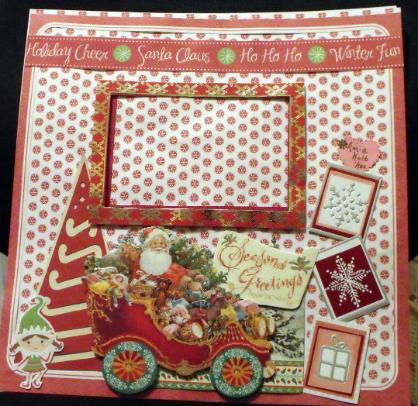
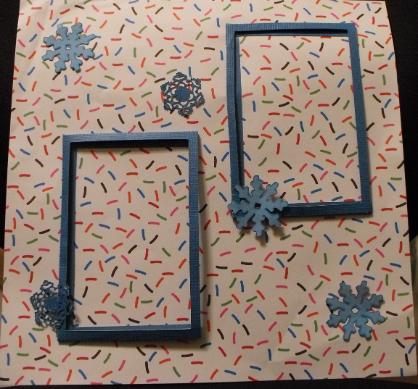
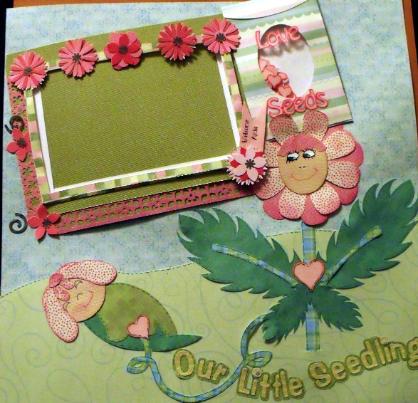
The first page of this layout shows the frame covered with a frame that I cut from a Christmas card.  It appears to be lifted up and not just flat. 

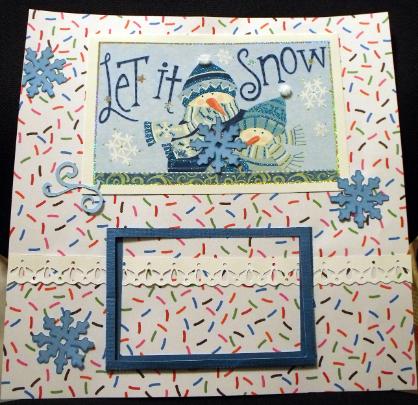
The first page sports the front of a Christmas card from last year.  The frames were left black this time because the background is so busy.  Though the lace shows through the frame, it will be covered once the photo is inserted. The swirl is from a punch.  The snowflakes were made from a file that I had.  You can find snowflake files here:  http://izzaboutchu.yolasite.com/weather.php  Scroll down until you find winter.


Make a free website with Yola